Roblox SDK
Integrating Roblox with StarWatch is a two-part process. First, your StarWatch instance needs to be created within the StarWatch Manager. Then the StarWatch SDK needs to be installed and integrated into your project.
Collect credentials
- Go to the manager site.
- Select your team.
- Select Manage on the instance.
- Click to copy your app key, secret key and API URL.
Have these items ready to use for the installation process.
Install
Get the SDK
You can get the SDK from either a ZIP or through Wally. The instructions for both are below.
From a ZIP file
- Download the SDK ZIP package from here.
- Unzip the project file into your project.
- Configure Rojo with the following mapping, inside of the
default.project.json
{
	"ReplicatedStorage": {
		"$className": "ReplicatedStorage",
		"Packages": {
			"$path": "Packages",
			"starwatch-sdk-roblox-common": {
				"$path": "StarWatchPackages/starwatch-sdk-roblox-common"
			}
		}
	},
	"ServerStorage": {
		"$className": "ServerStorage",
		"ServerPackages": {
			"$path": "ServerPackages",
			"starwatch-sdk-roblox": {
				"$path": "StarWatchPackages/starwatch-sdk-roblox"
			},
			"starwatch-sdk-roblox-common": {
				"$path": "StarWatchPackages/starwatch-sdk-roblox-common.lua"
			}
		}
	}
}
With Wally
StarWatch packages are also available in the public Wally registry:
starwatch-sdk-roblox-common starwatch-sdk-roblox
In your wally.toml:
[dependencies]
starwatch-sdk-roblox-common = "thatgameco/starwatch-sdk-roblox-common@^3.0"

[server-dependencies]
starwatch-sdk-roblox = "thatgameco/starwatch-sdk-roblox@^3.0"
Initialize SDK
- Client Setup
Add aLocalScriptto initialize Starwatch Client underStarterPlayerScripts:
local ReplicatedStorage = game:GetService("ReplicatedStorage")
local StarwatchCommon = require(ReplicatedStorage.Packages["starwatch-sdk-roblox-common"])

StarwatchCommon.Client.StarwatchClient.init()

print("Starwatch Client initialized!")- Server Setup
AddScriptto initialize Starwatch Server underServerScriptService. In this example, we retrieve the required secrets from aSecretsModulestored inServerStorage, but you can provide these however you like. Make sureAPP_KEY,SECRET_KEY(if applicable), andSTARWATCH_API_URLare inputs to theinitfunction.
local ServerStorage = game:GetService("ServerStorage")
local Starwatch = require(ServerStorage.ServerPackages["starwatch-sdk-roblox"])

-- Initialize the starwatch on server. These credentials can be found in the Starwatch Manager.
Starwatch.init({
	APP_KEY = "[YOUR_APP_KEY]",
	SECRET_KEY = "[YOUR_SECRET_KEY]", -- (if applicable)
	STARWATCH_API_URL = "[YOUR_STARWATCH_API_URL]"
})

print("Starwatch Server initialized!")
Custom account age tracking (Optional)
By default, StarWatch tracks when players created their Roblox accounts. However, you can override this to track how long players have been playing your specific game:
Starwatch.init({
	APP_KEY = "[YOUR_APP_KEY]",
	SECRET_KEY = "[YOUR_SECRET_KEY]",
	STARWATCH_API_URL = "[YOUR_STARWATCH_API_URL]",
	getAccountAge = getPlayerGameAgeDays -- Your function that returns days since first play
})- Enable HTTP Requests
- In Roblox Studio, open the top menu bar.
- Go to Home → Game Settings.
- Navigate to the Security tab.
- Turn on Enable HTTP Requests.
- Click Save.
Submit a game state
This content is optional for seeing users move around the map, but required for event-based features.
All events require the player to have a valid character with a HumanoidRootPart to determine their position. Events submitted without a valid player position are automatically skipped and will not be recorded. Support for position-independent events will be added in a future release.
Automatic event and gauge tracking
StarWatch includes built-in tracking for common Roblox events and gauges. To enable this feature, pass arrays of DefaultEvents and DefaultGauges enum values to the init function:
local ReplicatedStorage = game:GetService("ReplicatedStorage")
local StarwatchCommon = require(ReplicatedStorage.Packages["starwatch-sdk-roblox-common"])
local DefaultEvents = require(ReplicatedStorage.Packages["starwatch-sdk-roblox-common"]).Shared.Enums.DefaultEvents
local DefaultGauges = require(ReplicatedStorage.Packages["starwatch-sdk-roblox-common"]).Shared.Enums.DefaultGauges

StarwatchCommon.Client.StarwatchClient.init({
	automaticEventTracking = {
		DefaultEvents.SPAWN,
		DefaultEvents.DESPAWN,
		DefaultEvents.TAKE_DAMAGE,
		DefaultEvents.HEAL,
		DefaultEvents.DEATH,
		DefaultEvents.JUMP,
		DefaultEvents.VEHICLE_THROTTLE,
		DefaultEvents.VEHICLE_BRAKE,
		DefaultEvents.PURCHASE,
		DefaultEvents.CHAT,
	},
	automaticGaugeTracking = {
		DefaultGauges.HEALTH,
		DefaultGauges.DRIVING_STATE,
		DefaultGauges.SPEED,
		DefaultGauges.PLACE_VERSION,
	}
})
The following events are available for automatic tracking:
| Event name | Description |
|---|---|
| DEATH | Fires when the player dies |
| JUMP | Fires when the player jumps |
| SPAWN | Fires when the player’s character spawns |
| DESPAWN | Fires when the player’s character is removed |
| TAKE_DAMAGE | Fires when the player takes damage, includes amount |
| HEAL | Fires when the player heals. Uses batching system: accumulates healing until reaching 10 HP threshold, then fires event with amount >= 10. Small heals (<0.5 HP) are ignored to reduce noise |
| TOOL_EQUIPPED | Fires when a tool is equipped, includes tool name |
| TOOL_UNEQUIPPED | Fires when a tool is unequipped, includes tool name |
| PURCHASE | Tracks in-game purchases (DevProducts and GamePasses) |
| CHAT | Automatically tracks chat messages when players send messages via TextChatService |
| SIT | Fires when the player sits (in regular seats) |
| SWIM | Fires when the player starts swimming |
| CLIMB | Fires when the player starts climbing |
| FREEFALL | Fires when the player is falling |
| VEHICLE_ENTER | Fires when entering a vehicle, includes vehicle name |
| VEHICLE_EXIT | Fires when exiting a vehicle, includes vehicle name |
| VEHICLE_THROTTLE | Fires when accelerating a vehicle |
| VEHICLE_BRAKE | Fires when braking a vehicle |
The following gauges are available for automatic tracking:
| Gauge name | Description |
|---|---|
| HEALTH | Tracks player’s health as a continuous gauge, updates automatically when health changes |
| DRIVING_STATE | Tracks whether the player is currently driving a vehicle. Value is 1 when driving a vehicle, 0 when not driving. Updates automatically when entering/exiting vehicles |
| SPEED | Tracks player’s linear velocity |
| PLACE_VERSION | Tracks the version of the Roblox Place on which the StarWatch event was generated |
Submit events
To send a custom event, use:
local ReplicatedStorage = game:GetService("ReplicatedStorage")
local Starwatch = require(ReplicatedStorage.Packages["starwatch-sdk-roblox-common"]).Client.StarwatchClient

Starwatch.submitEvent("jump", {})
You can also attach metadata to custom events:
Starwatch.submitEvent("heal", {
	amount = amountHealed
})
Chat events
StarWatch provides specialized tracking for chat messages with dedicated parameters:
-- Basic chat event
Starwatch.submitChatEvent({
	message = "Hello world!"
})

-- Chat event with moderation flags and metadata
Starwatch.submitChatEvent({
	message = "This might be inappropriate",
	flagged = true,
	annotation = "Flagged by moderation system",
	tag = "moderated-message"
})
All parameters are optional. flagged defaults to false.
Set gauges
To set a gauge:
Starwatch.setGauge("Health", humanoid.Health)To get a gauge:
local currentHealth = Starwatch.getGauge("Health")
print("Current Health:", currentHealth) -- Output: Current Health: 85
To remove a gauge:
Starwatch.removeGauge("Health")To clear all gauges:
-- Useful when player joins a new match or switches game modes
Starwatch.clearAllGauges()
Place version automatic gauge
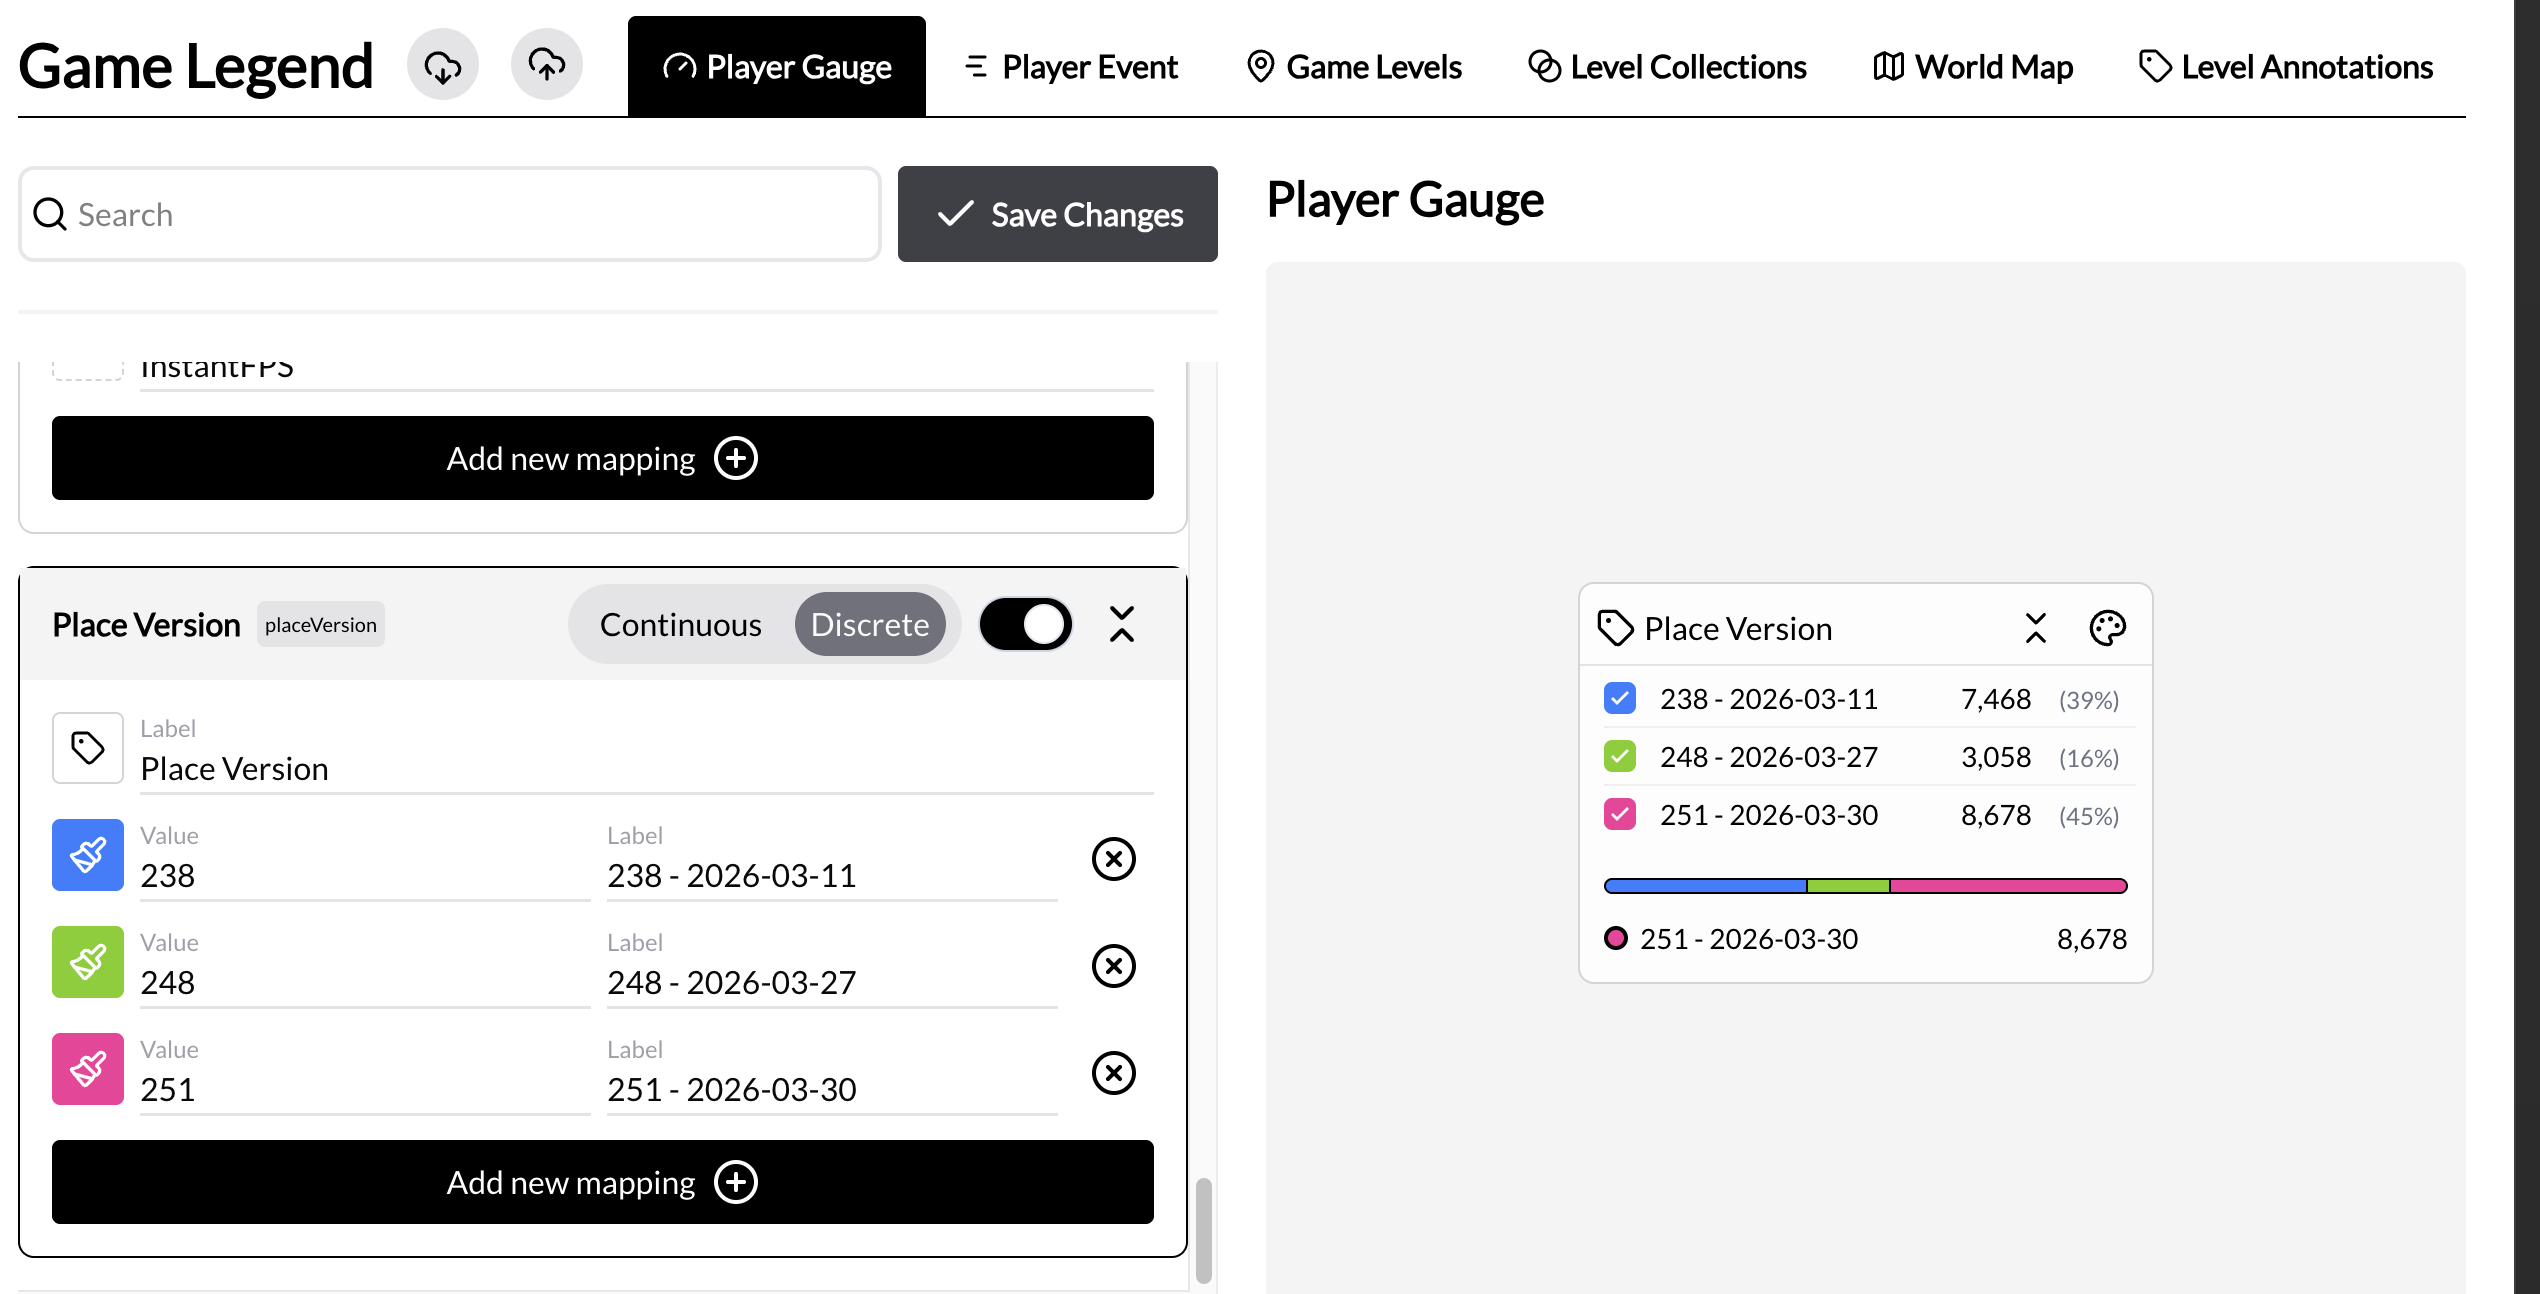
One of the automatic gauges shown above tracks the Roblox Place version. Upon a new version update, this gauge helps monitor which players are still on the old version and allows you to check the overall upgrade progress.
Though the version is sent automatically from the Roblox client, the mapping on StarWatch currently has to be done manually. Follow these steps to enable the place version attribute card:
- Go to your game on StarWatch.
- Navigate to Game Legend > Player gauge.
- If the default gauge
DefaultGauges.PLACE_VERSIONis enabled in your game, there should be an entry forplaceVersionin the list. Change its type toDiscrete. - Give your attribute card a title and an icon.
- Add new mappings with the value as the place versio, then assign and a label and color. Place versions can be found in the Roblox Creator Dashboard under Experiences -> [Your Experience] -> Places -> [Your Place] -> Version History.
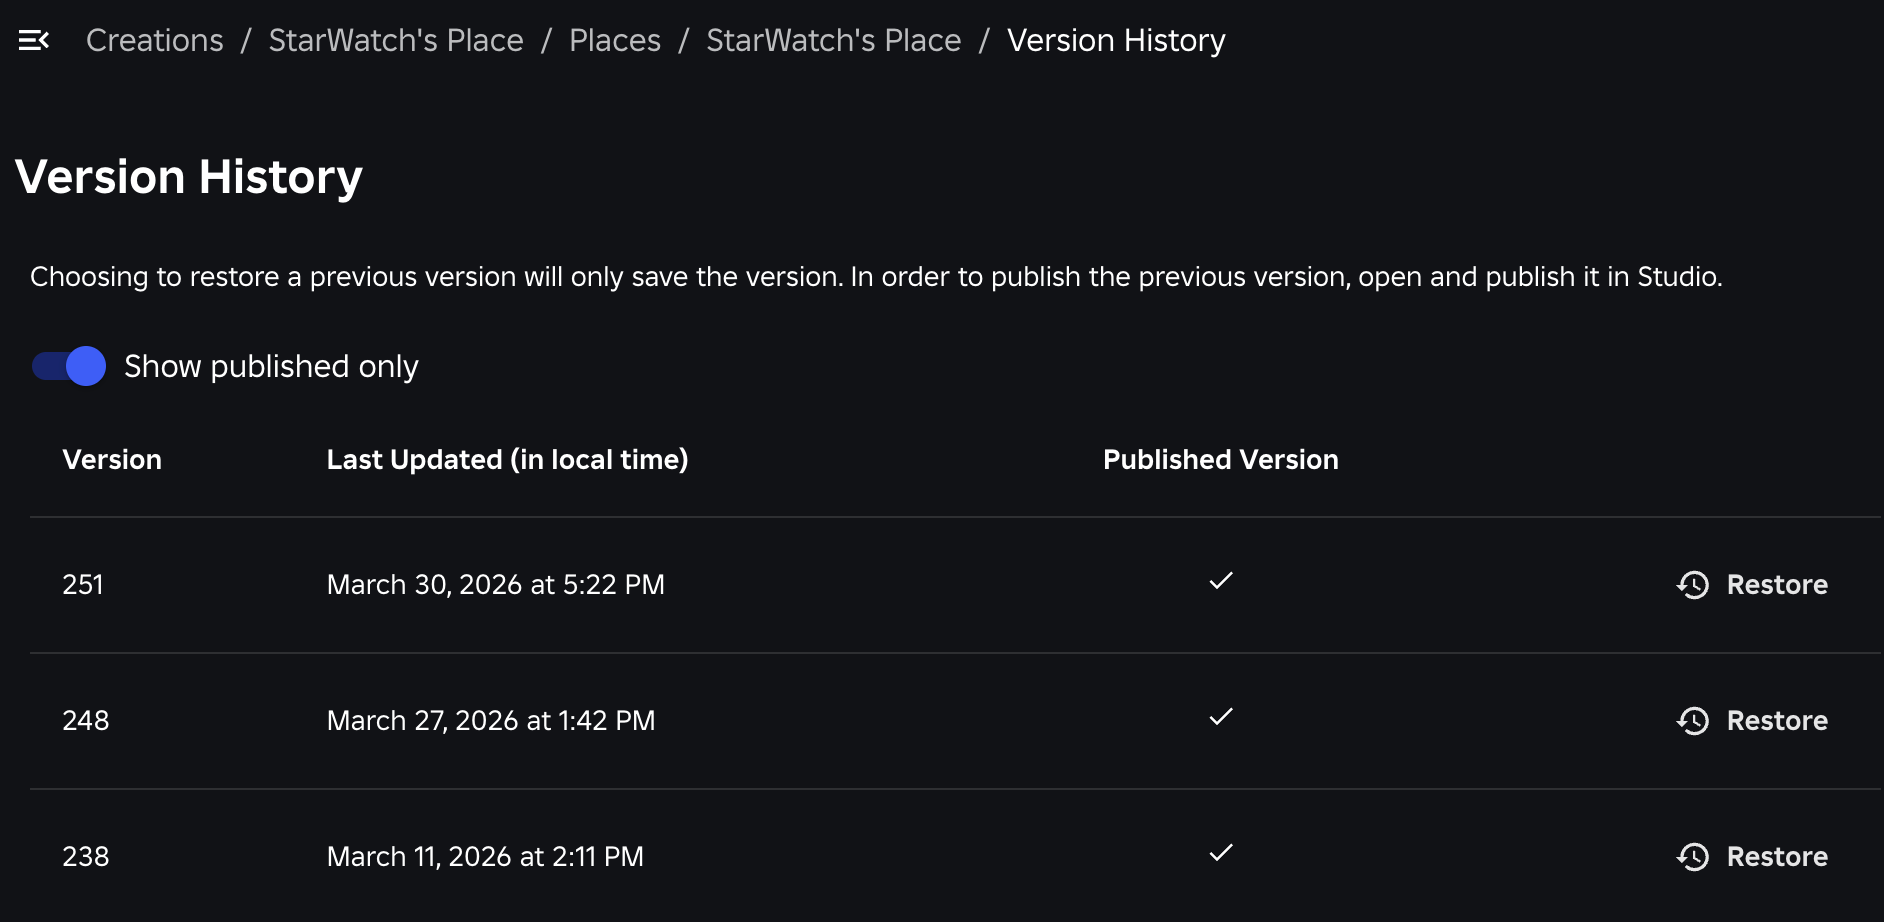
- Enable the attribute card using the toggle in the top left.
- Save your changes. Your attribute card should look similar to this:
- Navigate to the map page.
- In the Attributes dropdown, turn on the new attribute card.
- The Place version attribute card should now be visible.
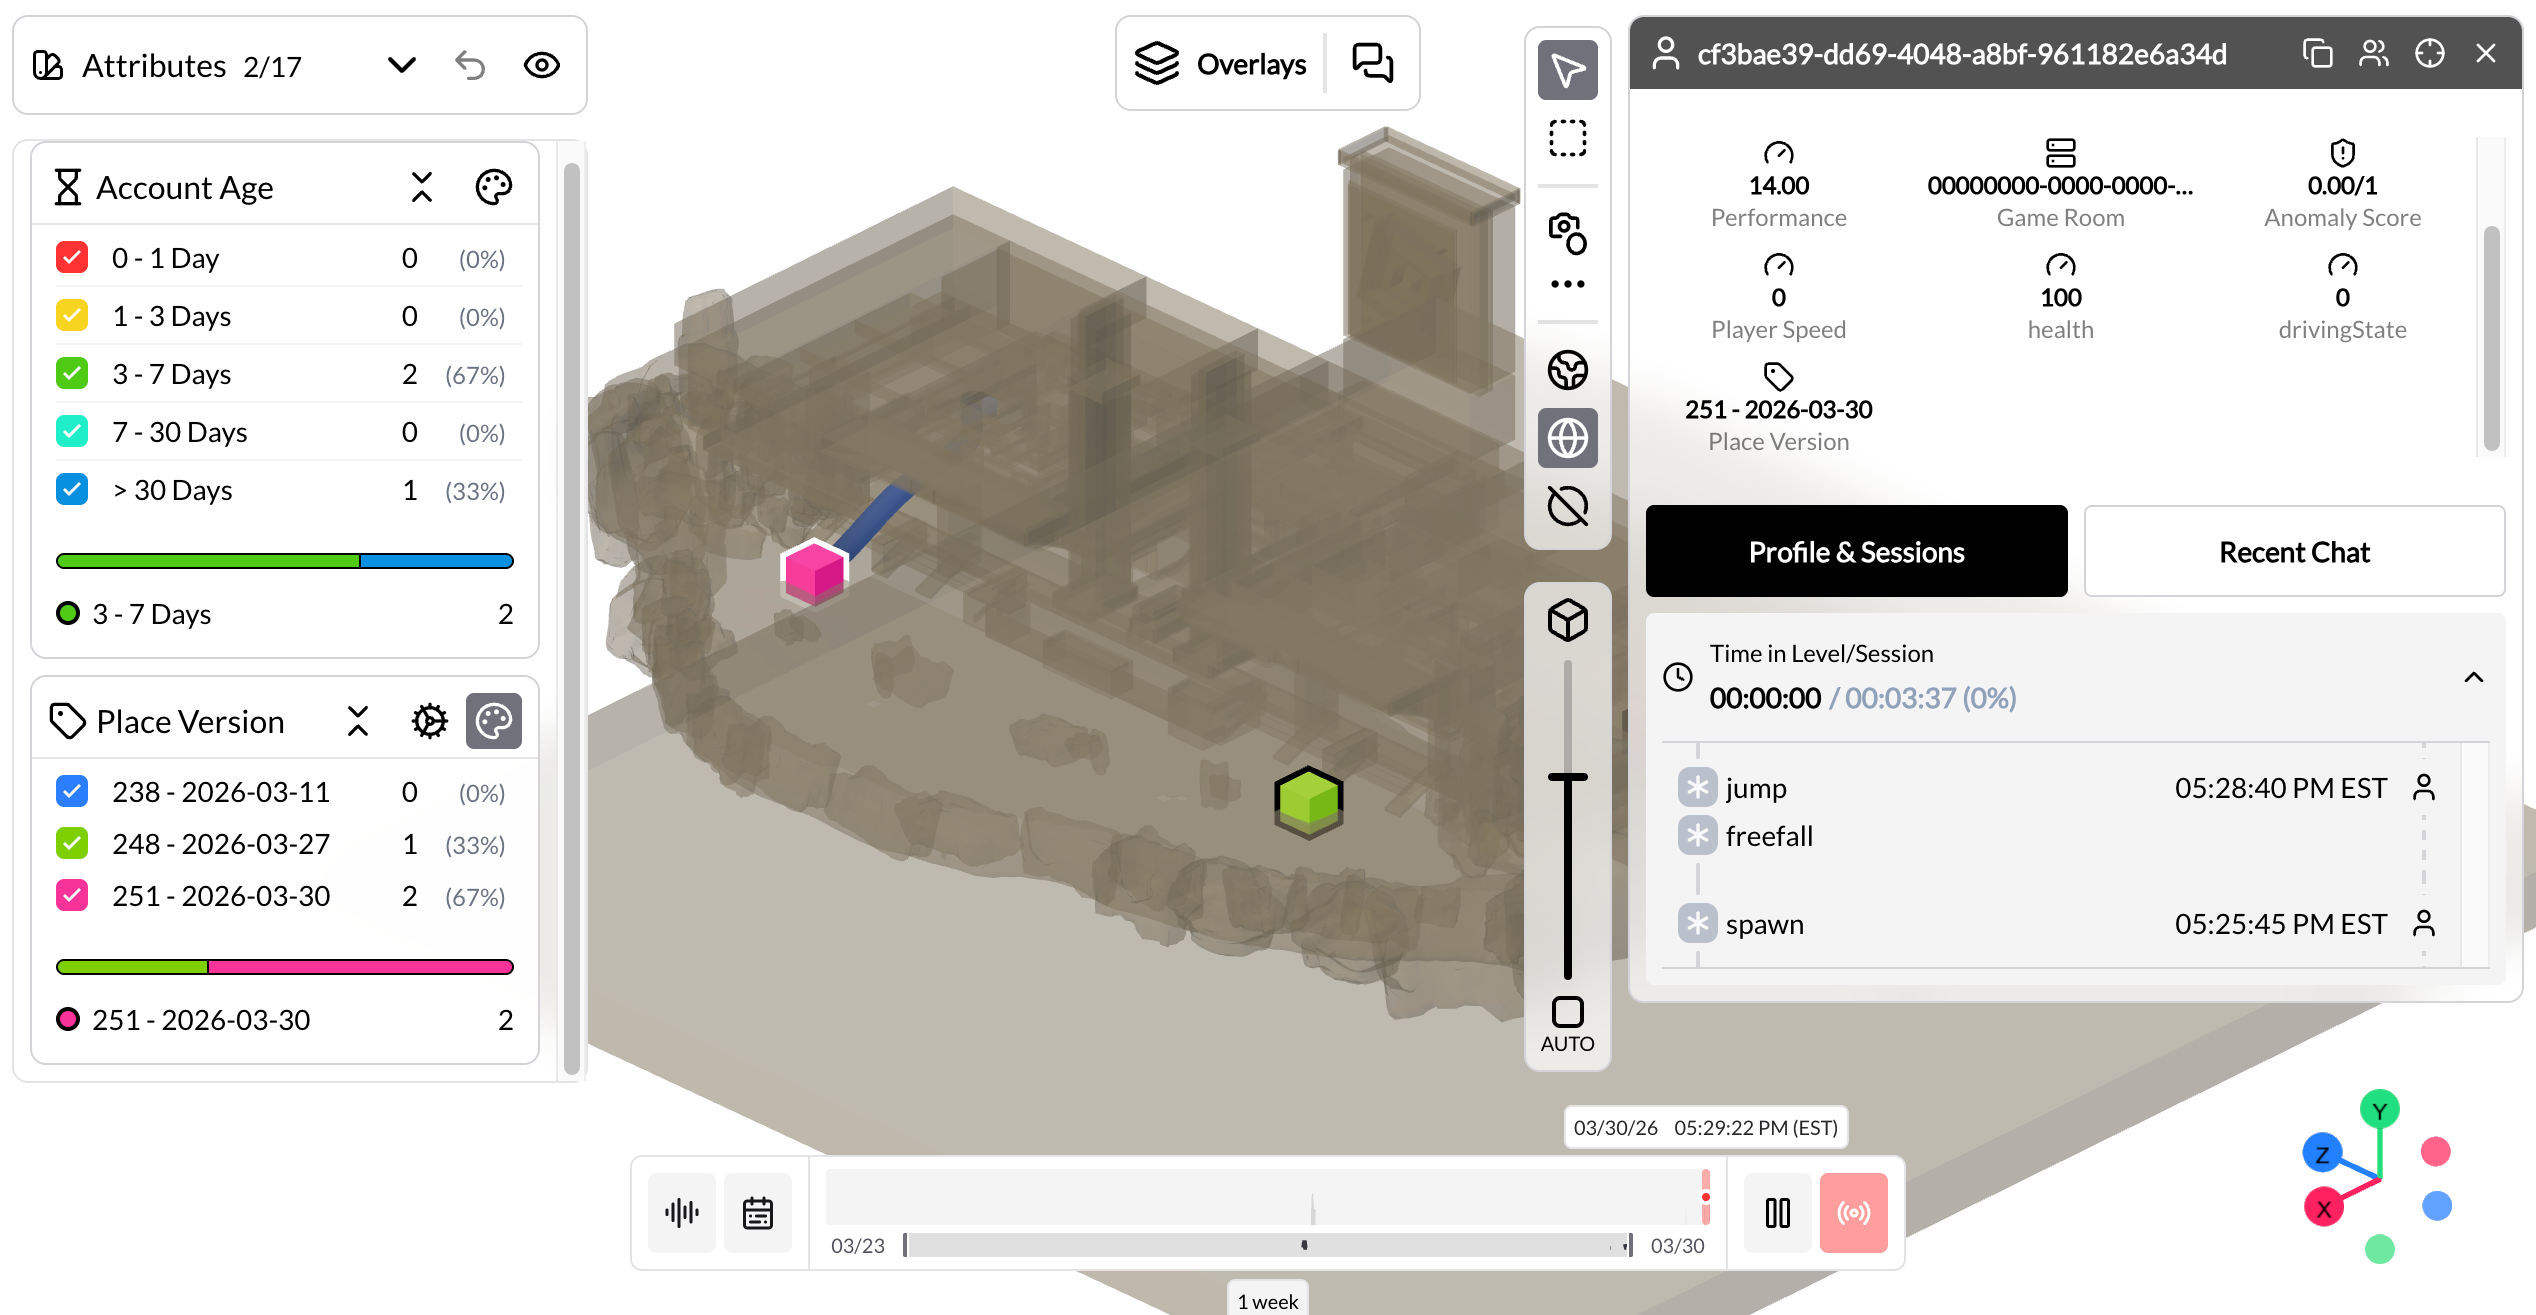
You don’t need to map all versions from the history, only the versions that are currently relevant.
When colored by this attribute card, players on an unmapped version will show as black. Selecting any of those players will display the gauge value in the right panel. This is a quick way to know unmapped values without going to the Roblox Place Version History.
Customize level name
StarWatch collects event information based on the Roblox place. Within StarWatch, the place concept is referred to as a level. By default, the SDK reports the Roblox place ID as the level name.
You can customize this behavior by adding a getLevel function to the SDK initialization (init) as shown in this example:
StarwatchCommon.Client.StarwatchClient.init({
	getLevel = function()
		return "MyGameLevel"
	end,
})
You can also programmatically divide a single Roblox place into multiple StarWatch levels. The example below changes the reported level based on the player’s current position:
local Players = game:GetService("Players")

StarwatchCommon.Client.StarwatchClient.init({
	local player = Players.LocalPlayer
	local root = player.Character and player.Character:FindFirstChild("HumanoidRootPart")
	if root and root:IsA("BasePart") and root.Position then
		if root.Position.Z > 160 then
			return "LevelB"
		end
	end
	return "LevelA"
})
Integrate 3D terrain
Export terrain
Select the content you want to export based on what you would consider terrain. Paste this into the Explorer Panel search bar to help:
Anchored=true AND CanCollide=true AND Transparency<1This search may include the Workspace object at the top. Do not include Workspace in your export.
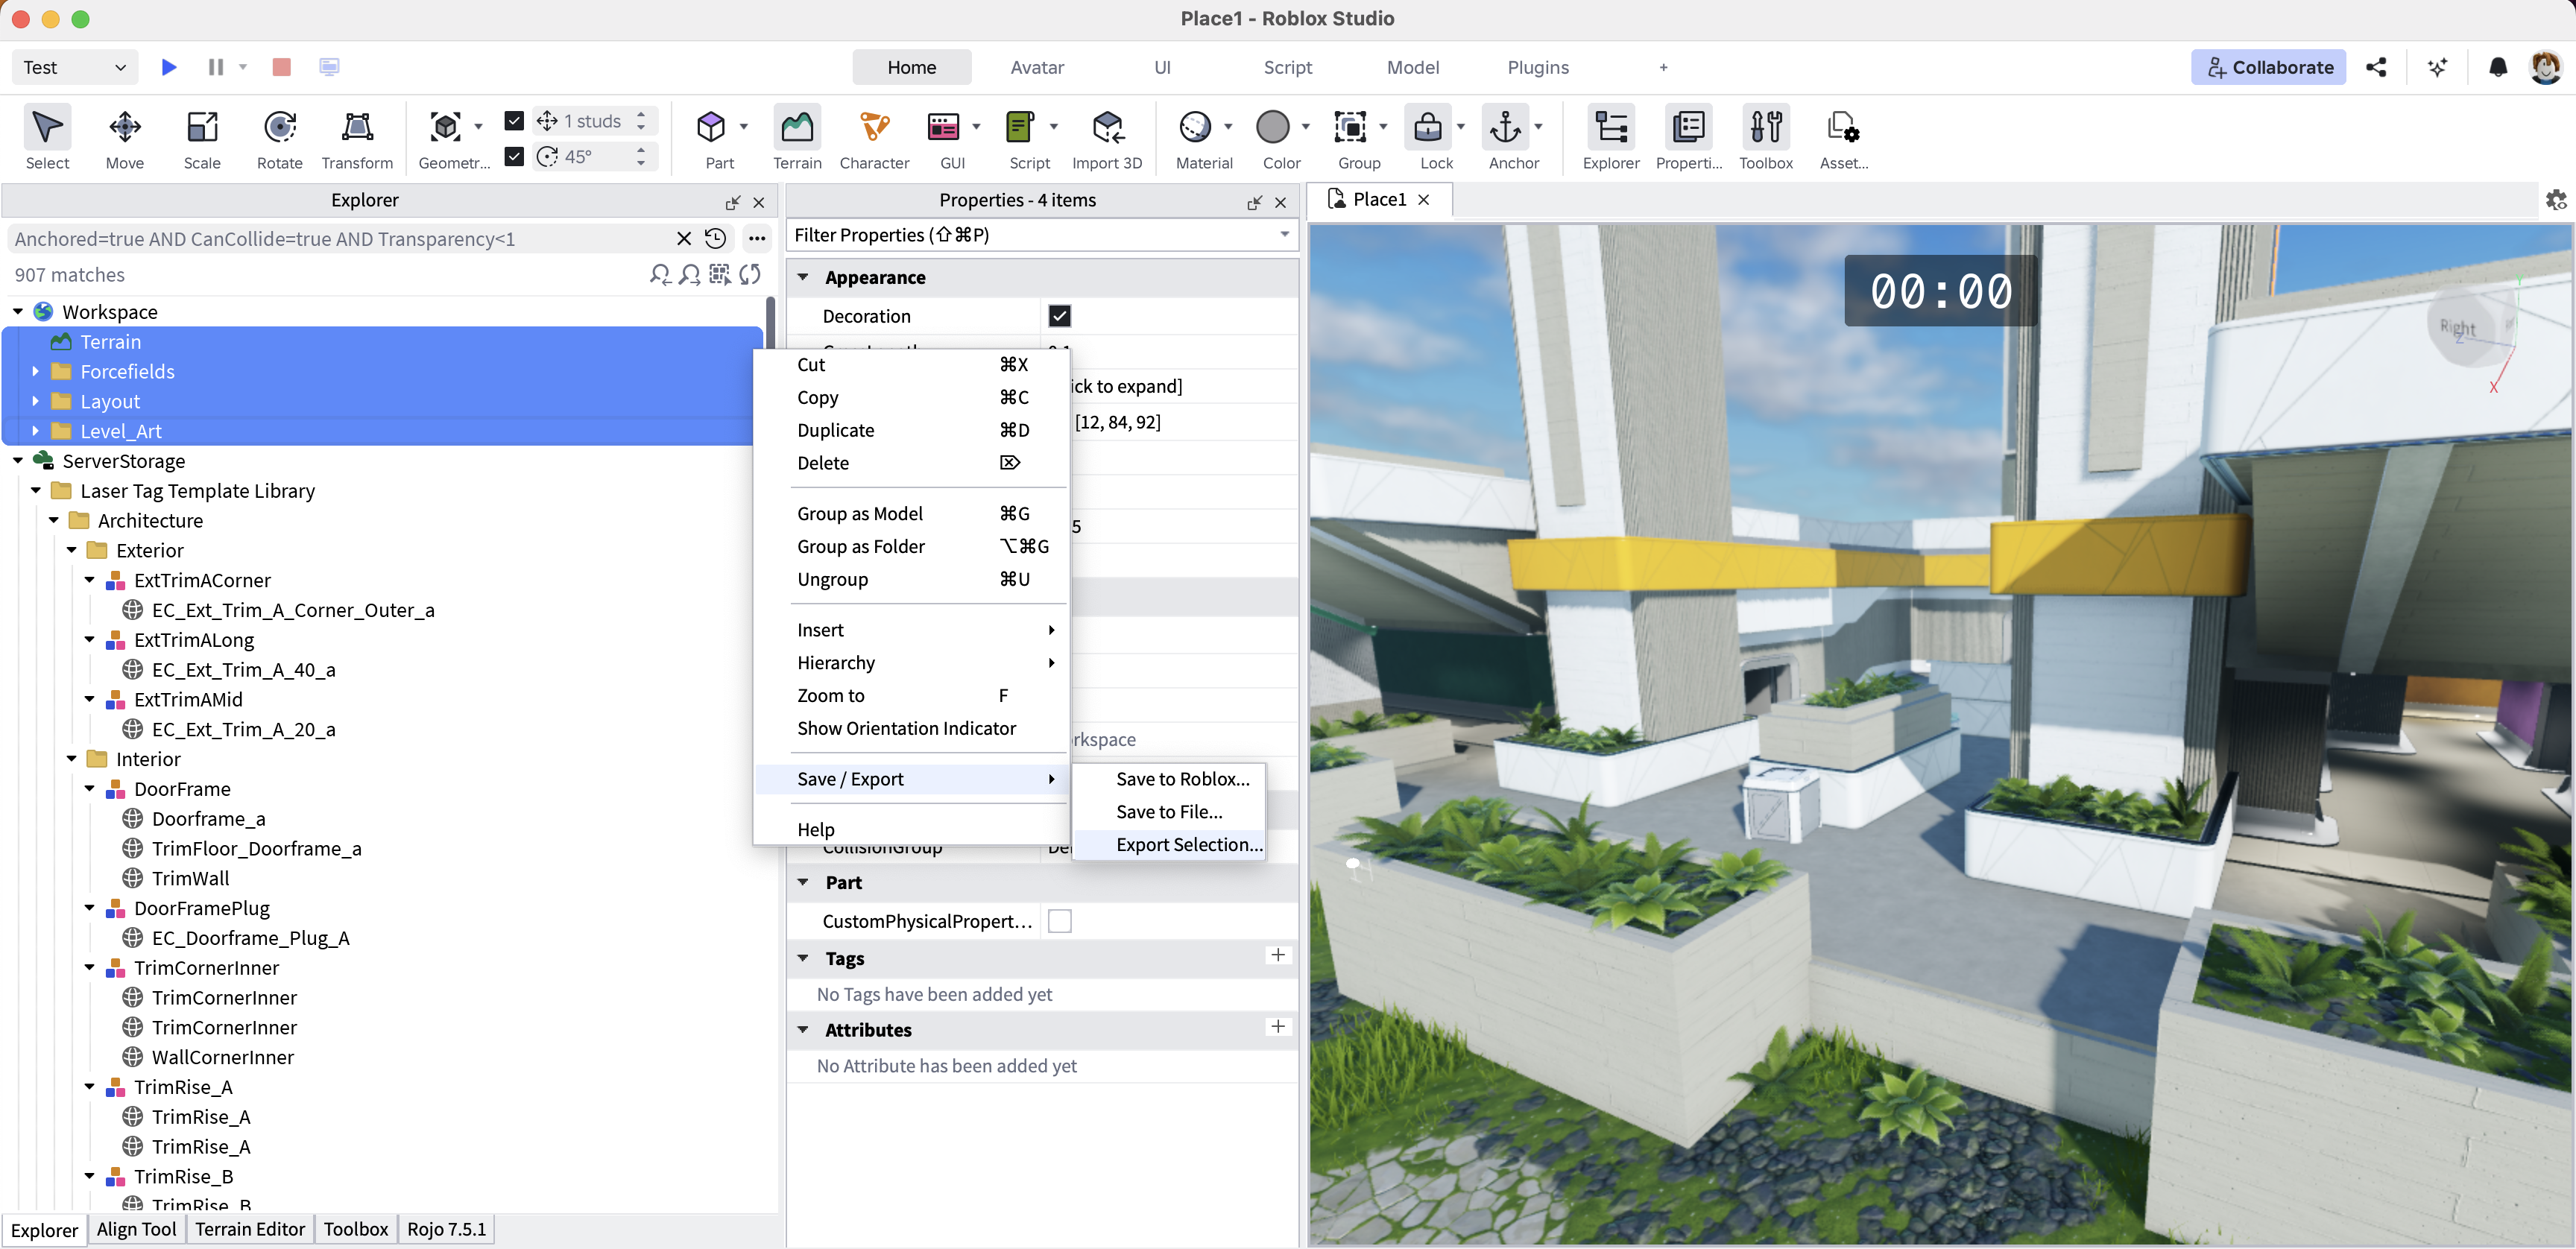
From this point there are two options:
- Convert the
.objcontent into a.glb. Follow our terrain optimization guide for help. - Upload the
.objdirectly. Texture data will not be included.
Upload to StarWatch
Once you have your terrain file:
- Click the , and go to the Game Legend
- Open the Game Levels tab.
- Select the Upload Map button to assign a .glb to that level, which then appears in the map view.

In order for levels to appear on this page there must be recent data sent to StarWatch about that level, or it must have been previously configured.