Unity SDK
Integrating Unity with StarWatch is a two-part process. First, your StarWatch instance needs to be created within the StarWatch Manager. Then the StarWatch SDK needs to be installed and integrated into your project.
Collect credentials
- Go to the manager site.
- Select your team.
- Select Manage on the instance.
- Click to copy your app key and API URL.
Have these items ready to use for the installation process.
Install
Add dependencies
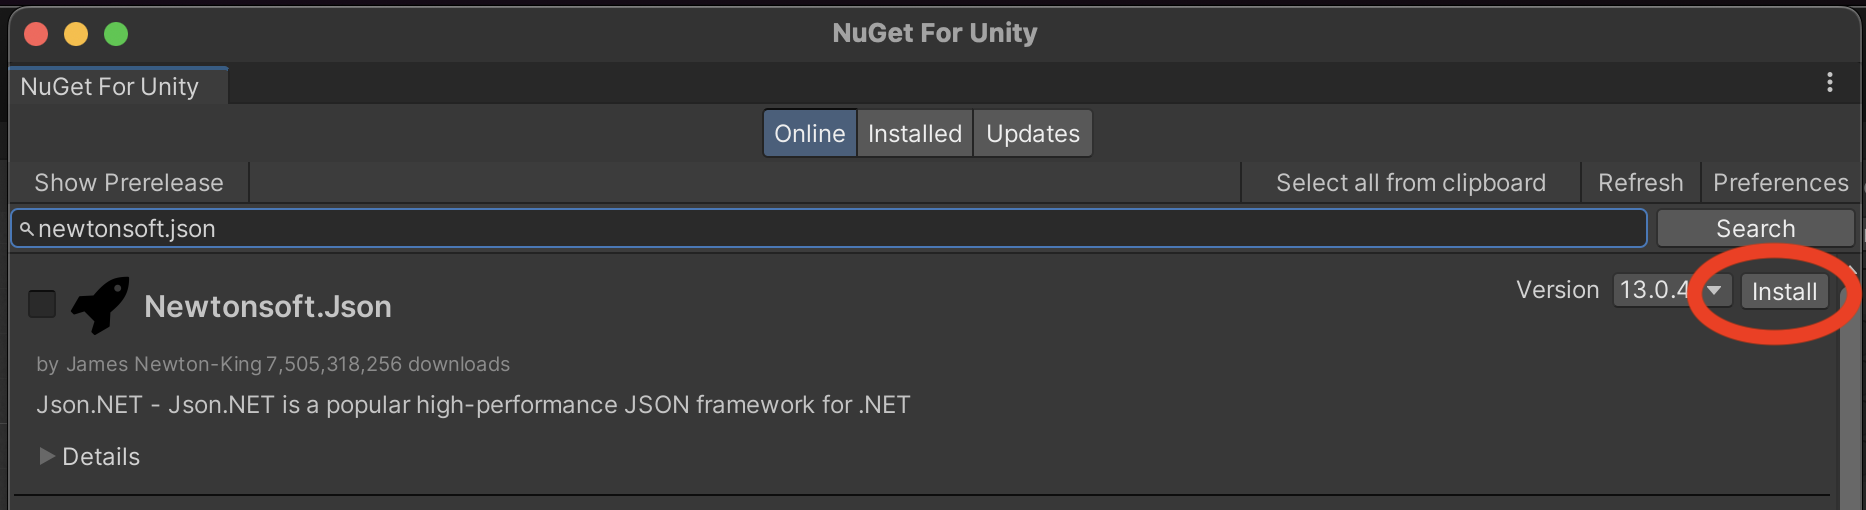
The StarWatch Unity SDK relies on Newtonsoft.Json for serialization. The easiest way to install this asset is via NuGetForUnity. Instructions for installing NuGetForUnity can be found here
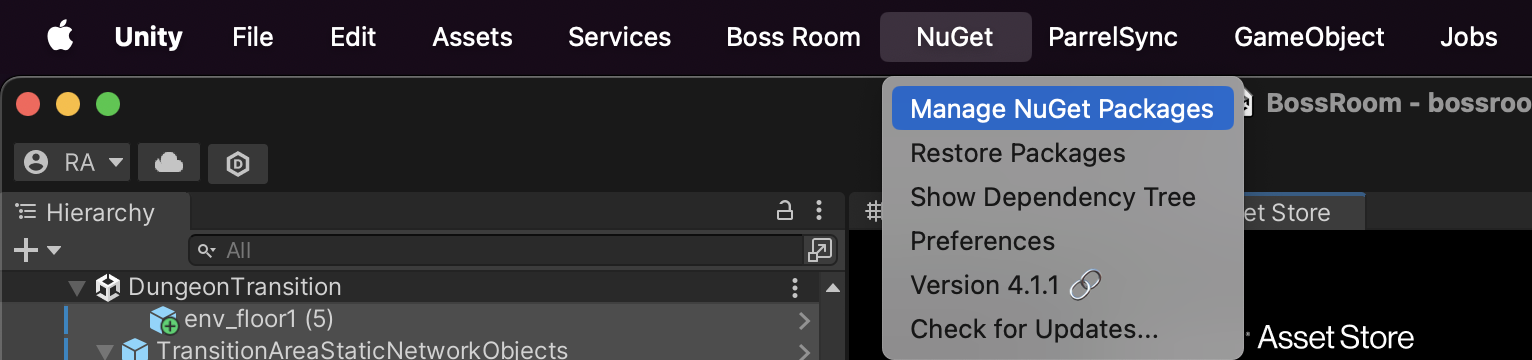
Afterwards, install Newtonsoft.Json via the NuGetForUnity manager.
Add StarWatch SDK
- Download the SDK .zip package from here.
- Unzip the content.
- In Unity, open Window > Package Manager.
- Click +.
- Select Install package from disk….
- Select the package.json file from the extracted folder.
Set up game objects
Initialize
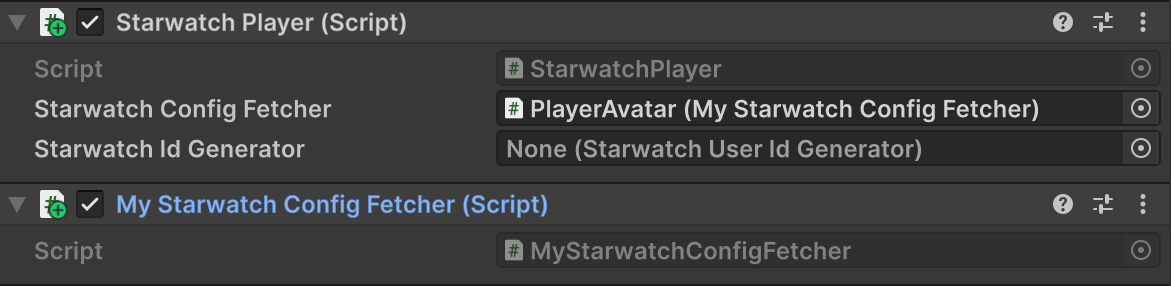
Add a StarWatchPlayer component to the player avatar game object.

This component has a field called StarWatch Config Fetcher, if not filled by default the configuration will be fetched from the environment variables:
- STARWATCH_API_URL - with the URL of the Starwatch API.
- STARWATCH_APP_KEY - with the StarWatch app key.
Feel free to extend StarWatchConfigFetcher and add the component in StarWatchPlayer with your own logic to fetch the configuration. Or for a quick integration test use StarWatchDebugConfigFetcher.
You can extend the StarWatchPlayer class to override the calculation of various fields such as the CountryCode.
Customize the User ID
The default StarWatch ID Generator creates a randomized User ID (GUID) every time the SDK is initialized. In order to tie all sessions of the same user together, it is necessary to customize that component.
The following example hashes the Unity Player ID and uses it to create the StarWatch ID:
using System;
using System.Security.Cryptography;
using System.Text;
using Unity.Services.Authentication;

namespace MyGame
{
    public class StarwatchUserIdFromUnityPlayerId : StarwatchUserIdGenerator
    {
        public override Guid GenerateStarwatchId()
        {
            string playerID;
            try
            {
                playerID = AuthenticationService.Instance.PlayerId;
            }
            catch (Exception e)
            {
                throw new Exception("AuthenticationService not initialized.", e);
            }

            if (playerID == null)
            {
                throw new Exception("User not signed in.");
            }

            // Step 1: Compute the SHA-256 hash of the player id
            using SHA256 sha256 = SHA256.Create();
            byte[] hashBytes = sha256.ComputeHash(Encoding.UTF8.GetBytes(playerID));

            // Step 2: Take the first 16 bytes from the SHA-256 hash to form a UUID (GUID)
            byte[] uuidBytes = new byte[16];
            Array.Copy(hashBytes, uuidBytes, 16);

            // Step 3: Create the UUID (GUID)
            Guid resultGuid = new(uuidBytes);

            return resultGuid;
        }
    }
}
The same can be done with any ID in your game (Steam ID, Epic Account ID) as long as the original ID is smaller than or equal to 16 bytes. It is up to you to either hash the original ID or use the original bytes directly (filling the rest of the 16 bytes as needed).
After creating the custom StarwatchUserIdGenerator, update the StarWatch Player to use it instead of the default one.
Submit game state
This content is optional for seeing users move around the map, but required for event based features.
Submit events
using Starwatch;
using UnityEngine;
public class PlayerLogic : MonoBehaviour
{
    private StarwatchPlayer telemetry;
    void Awake()
    {
        telemetry = GetComponent<StarwatchPlayer>();
    }
    void Jump()
    {
        if (telemetry != null)
            telemetry.SubmitEvent("player_jumped");
    }
}
Set gauges
using Starwatch;
using UnityEngine;
public class PlayerLogic : MonoBehaviour
{
    private StarwatchPlayer telemetry;
    void Awake()
    {
        telemetry = GetComponent<StarwatchPlayer>();
    }
    void TakeDamage(double amount)
    {
        // ...damage logic here...
        // Update gauges only when value changes
        if (telemetry != null)
            telemetry.UpdateGaugeValue("player_health", health);
    }
}
Integrate 3D terrain
Starwatch uses GL Transmission Format Binary files (.glb) as level maps.
Export terrain
UnityGLTF is a compatible tool for exporting maps from Unity.
Install the exporter
Install the UnityGLTF package.
- In Unity, open Window > Package Manager.
- Click +.
- Select Install package from git URL….
- https://github.com/KhronosGroup/UnityGLTF.git
- Click Add.
Export a scene
Select the content you want to export based on what you would consider terrain.
- Open the Editor search menu.
- Select terrain-like objects. Use this string as a baseline:
-t:NavMeshObstacle -t:Light -t:Camera -t:ReflectionProbe -t:AudioSource -t:Animator -t:Animation -t:PlayableDirector -t:Canvas -t:EventSystem -t:Volume -t:ParticleSystem -t:TrailRenderer -t:LineRenderer -t:Projector -t:FlareLayer -t:LODGroup -t:CinemachineVirtualCamera -t:CinemachineBrain -t:NavMeshAgent- Highlight objects and select them in the hierarchy.
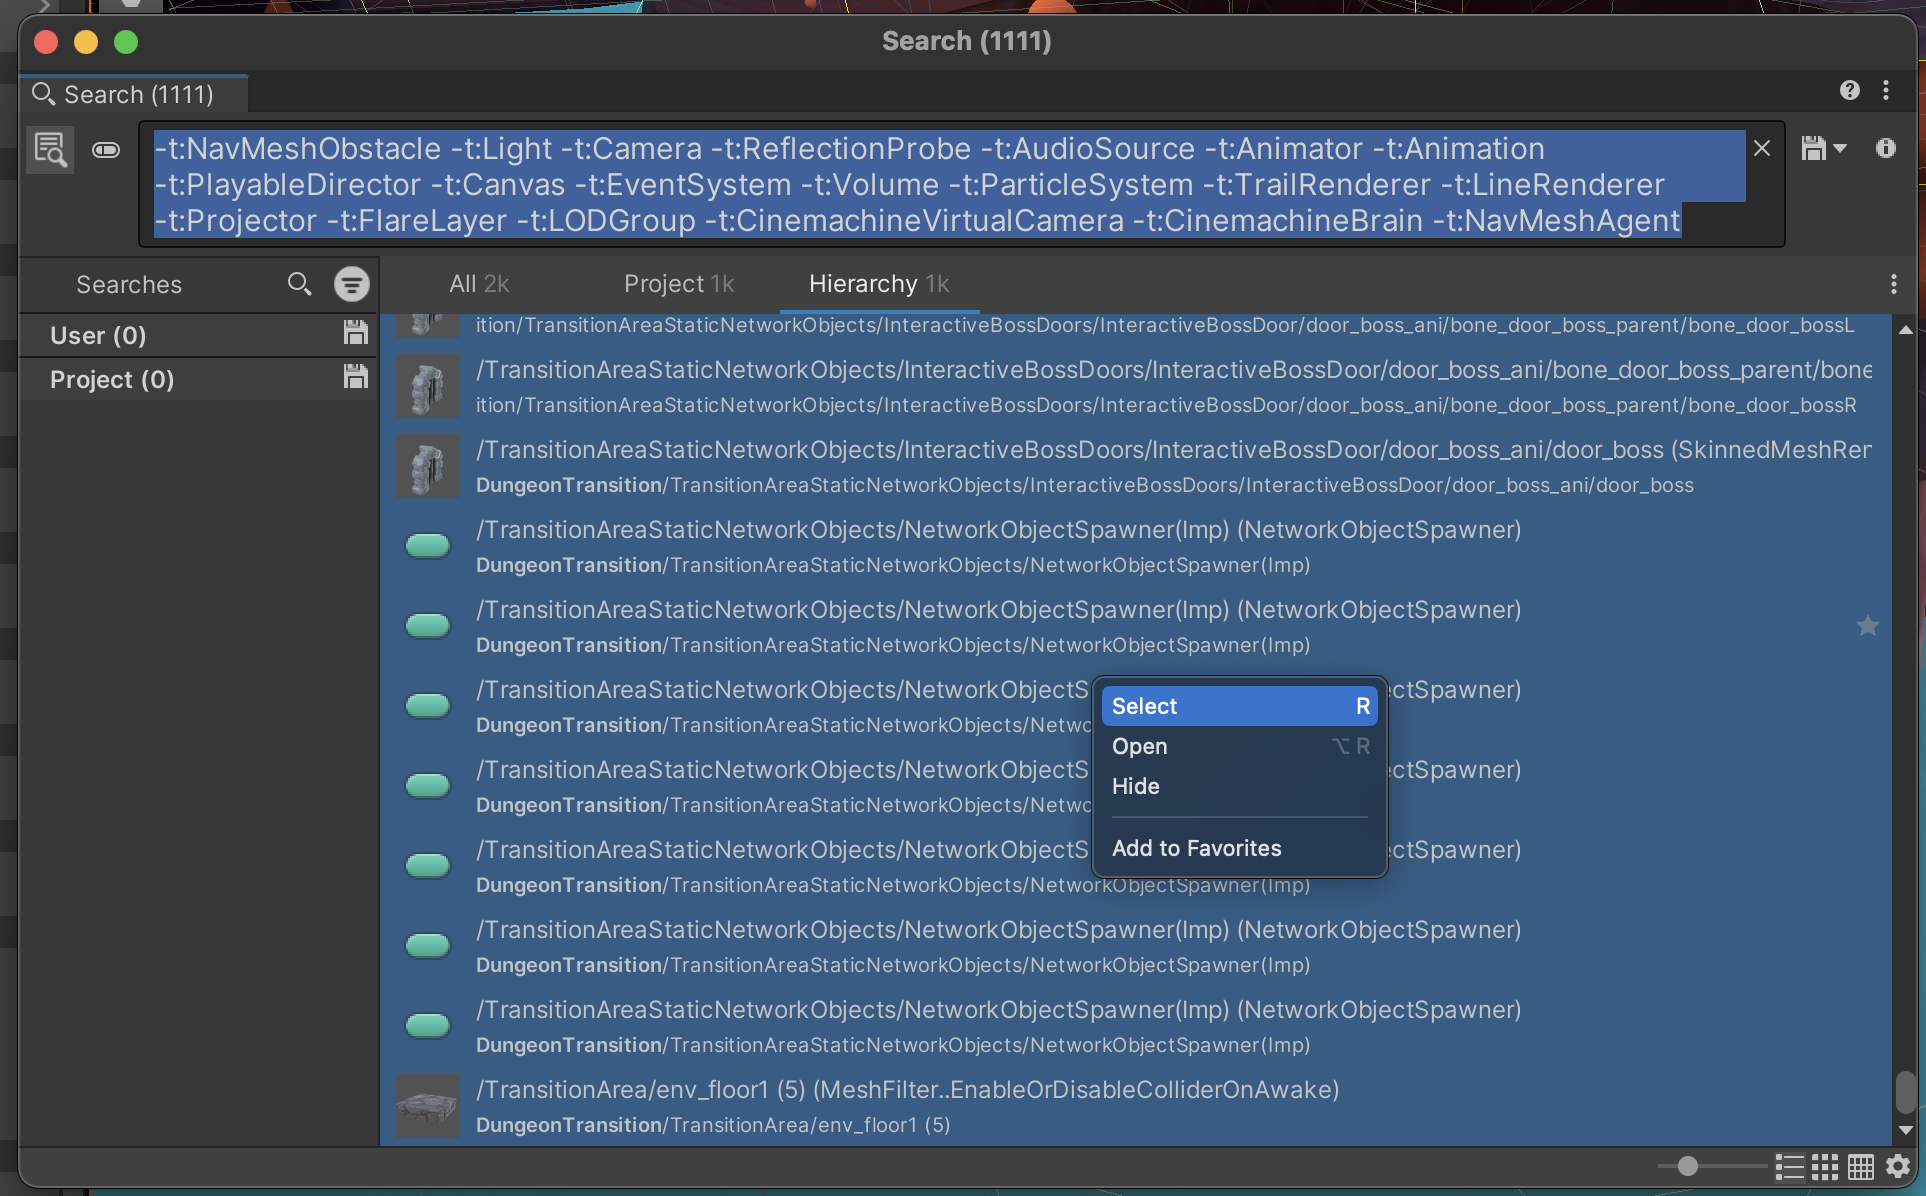
- Go to Assets > Export as glTF.
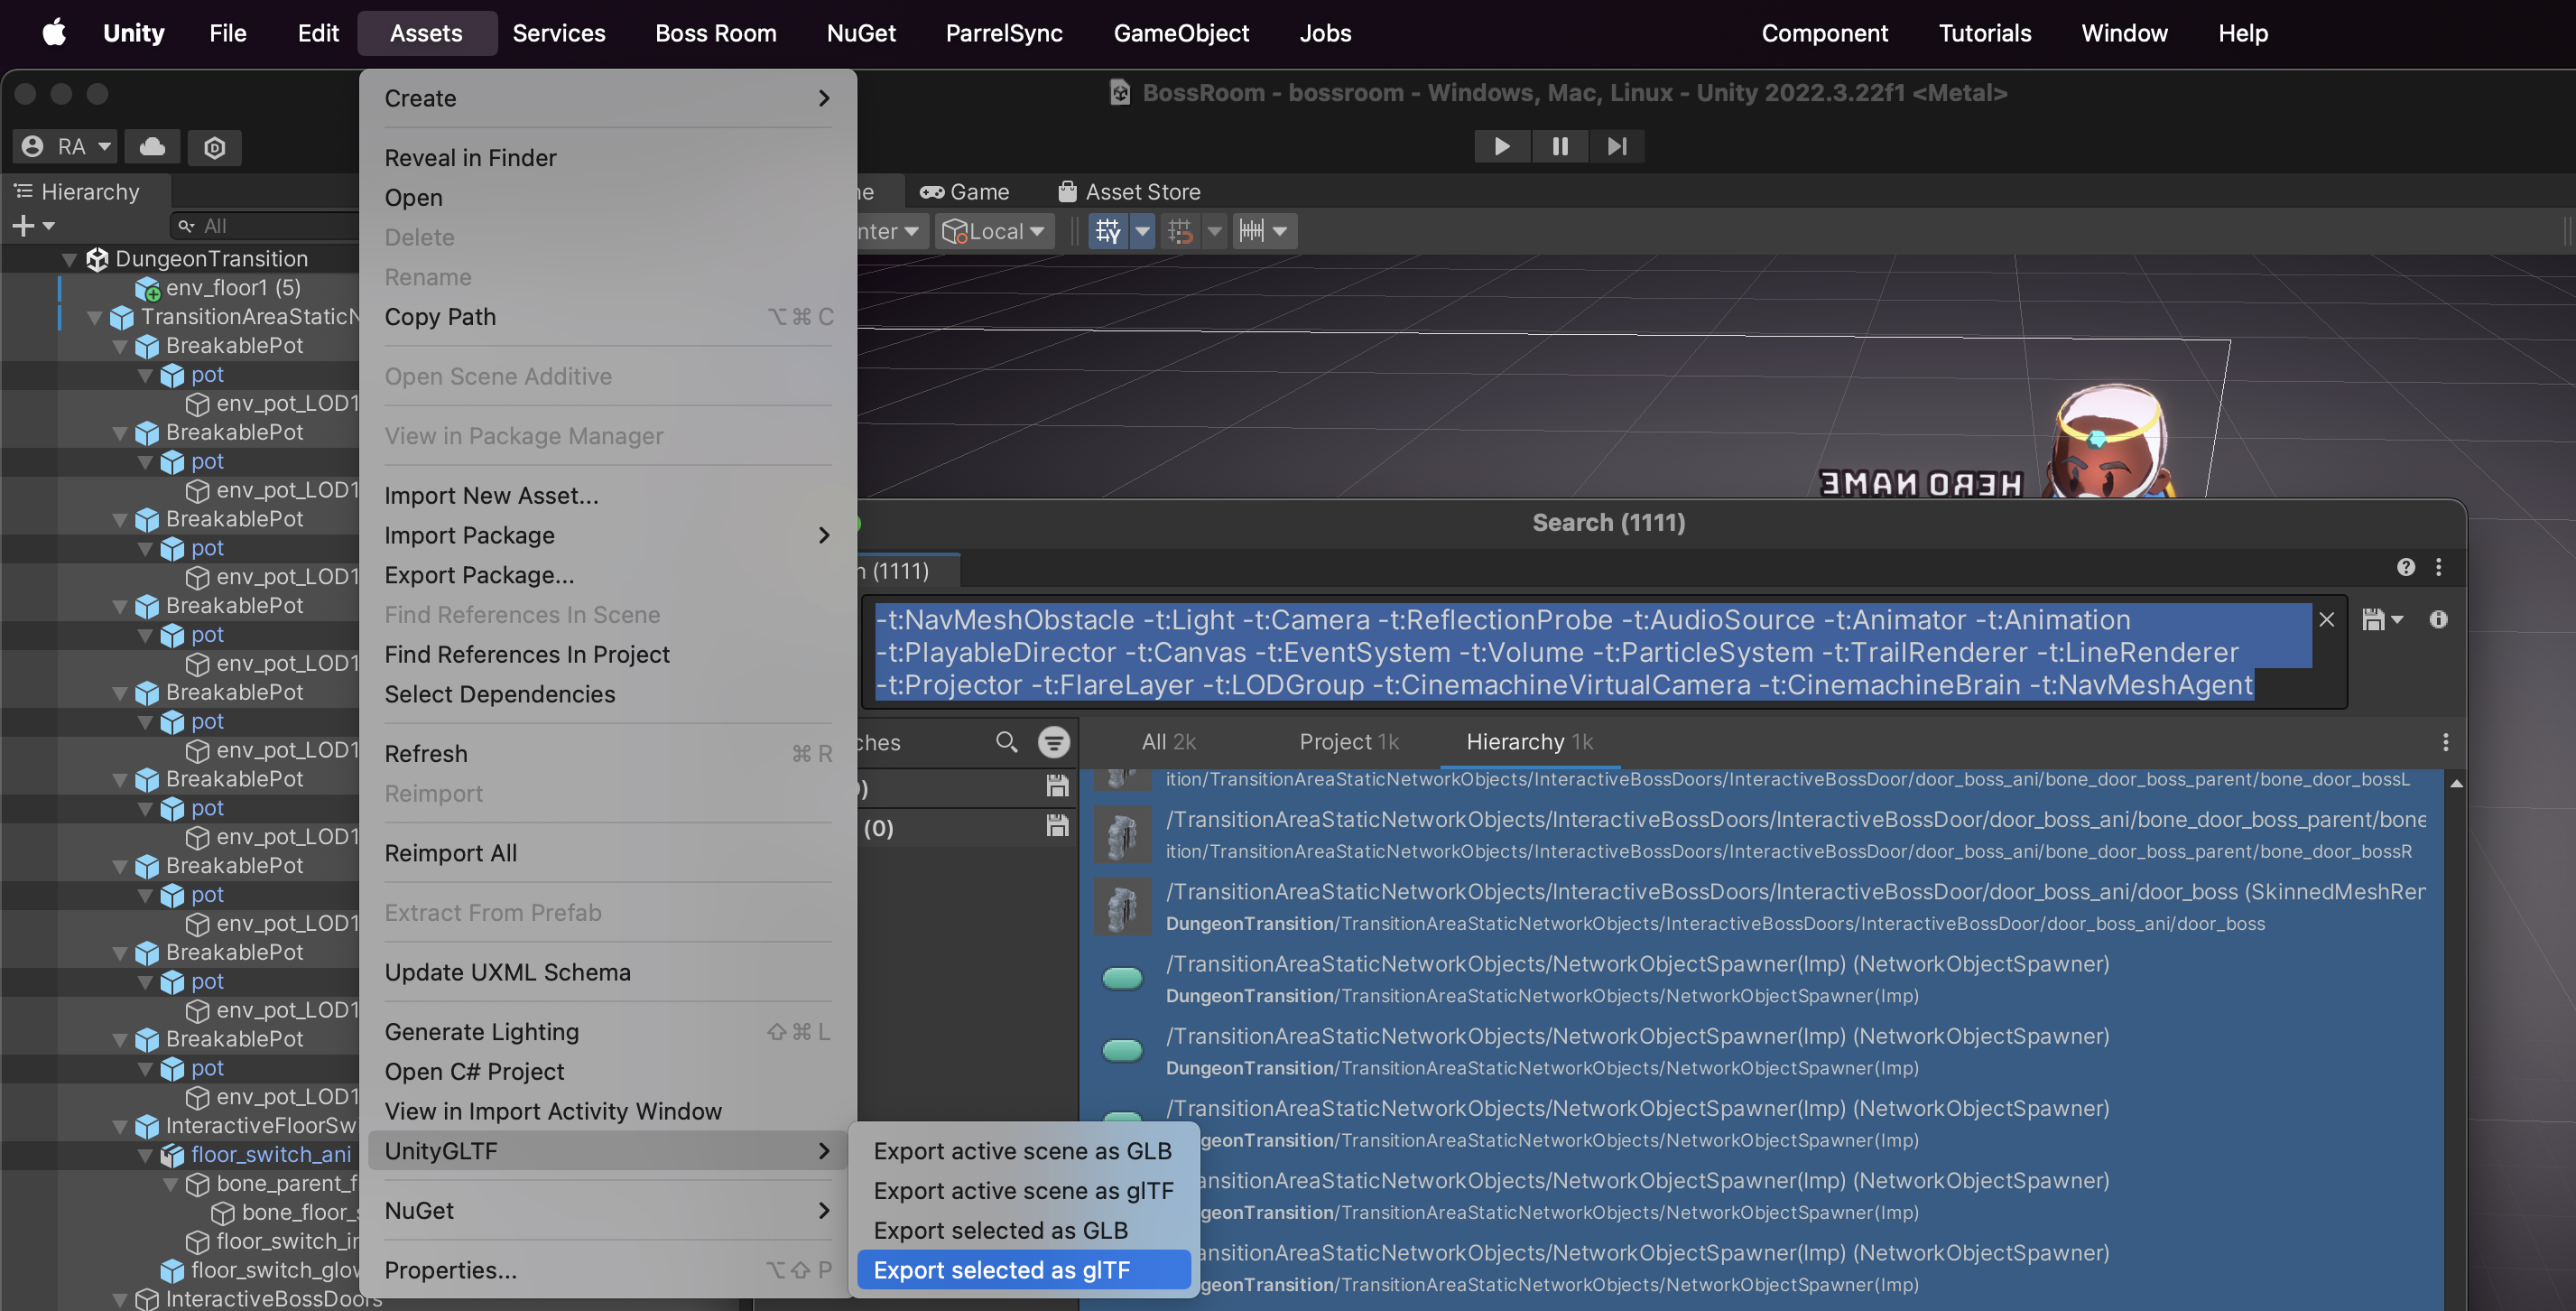
- Export the select items as a .glb.
Consider optimizing your exports even more by following the terrain optimization guide.
Upload to StarWatch
Once you have your terrain file:
- Click the , and go to the Game Legend.
- Open the Game Levels tab.
- Select the Upload Map button to assign a .glb to that level, which will then appear in the map view.
In order for levels to appear on this page there must be recent data being sent to StarWatch about that level, or it must have been previously configured.